Tutorials
Find answers to commonly asked questions below, or contact us for more help.
Click on any topic below to view step-by-step instructions
Email Us
How do I create an account?
Set up your CalfDex account in minutes
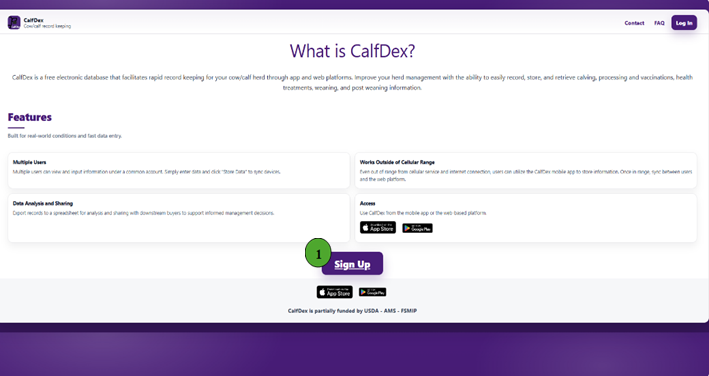
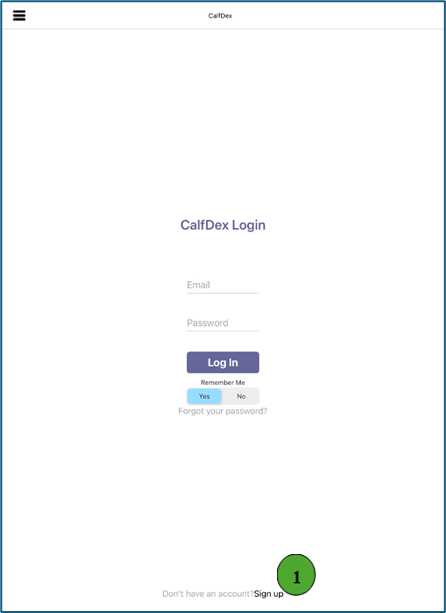
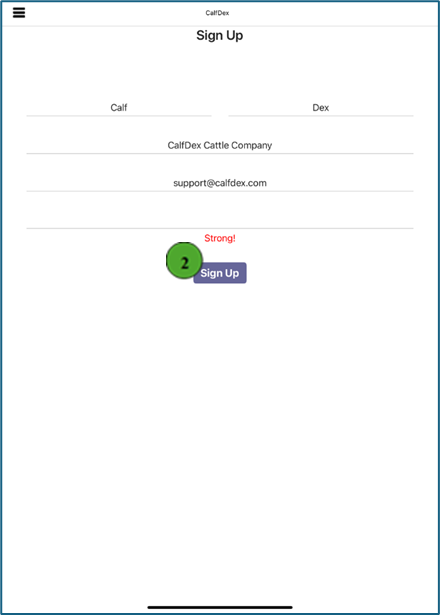
- Navigate to the bottom of the page at www.calfdex.com and click the purple "Sign Up" button, or follow this link Free Sign Up
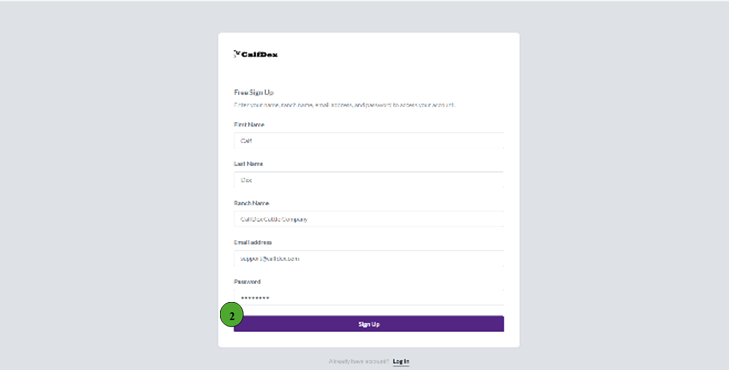
- Input your first name, last name, ranch name, email address, and password and click "Sign Up" to finish.
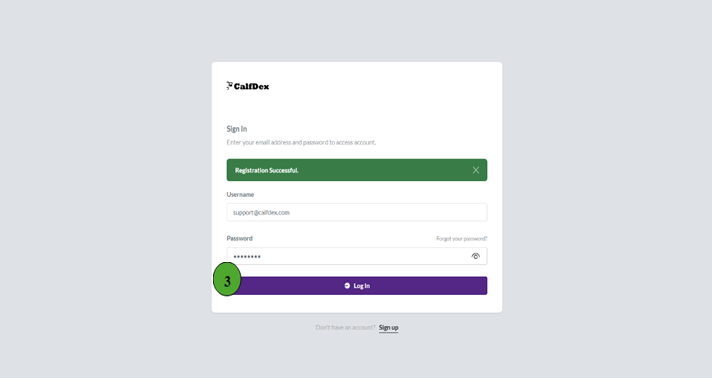
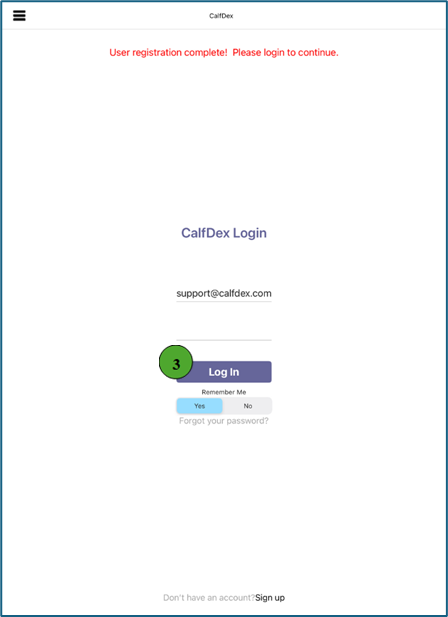
- "Registration Successful" will appear in a green box. Enter your newly created credentials and "Log In."
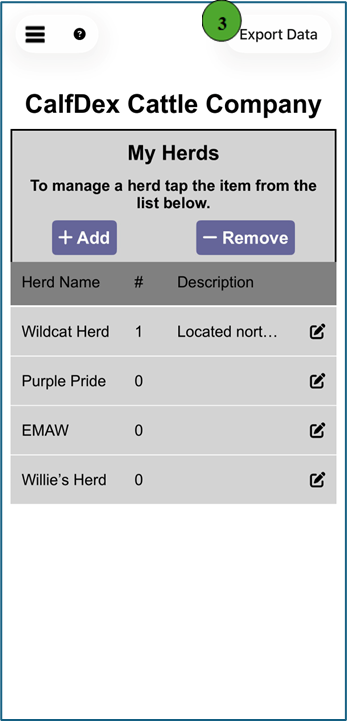
How do I create a herd?
Organize your cattle into groups
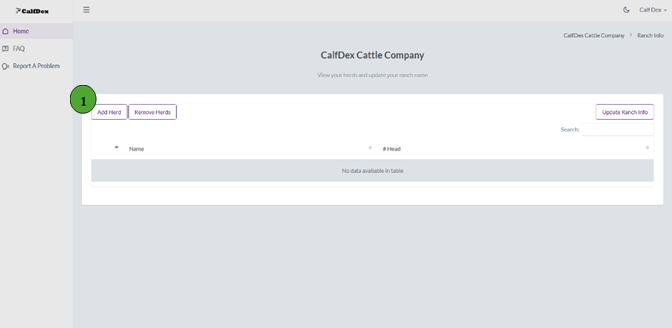
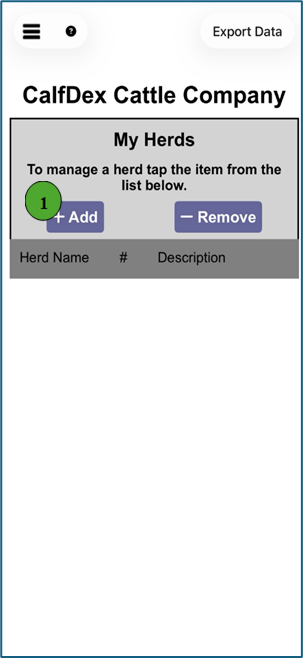
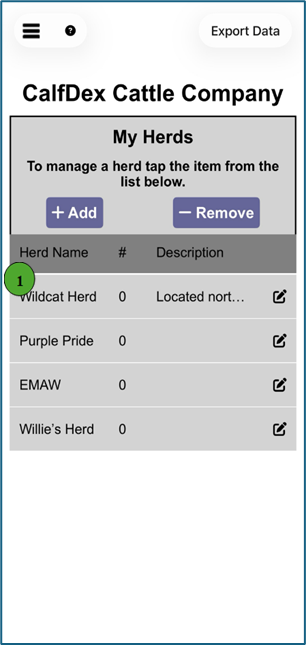
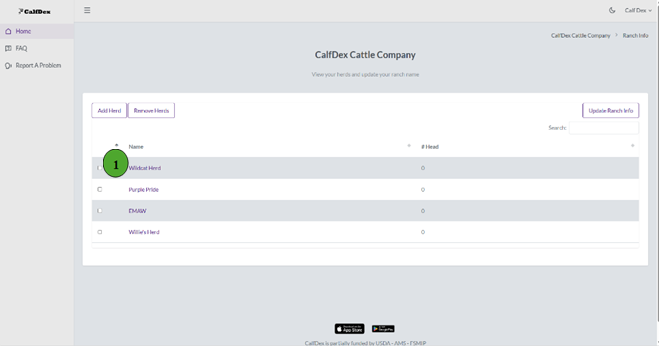
- Group your cattle into their appropriate herd by first logging into your account and then clicking "Add Herd" in the top left corner of your ranch's home screen
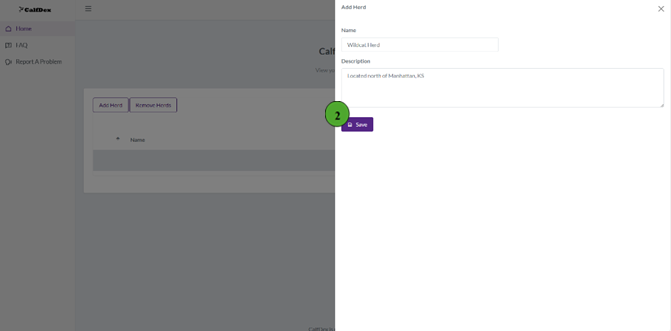
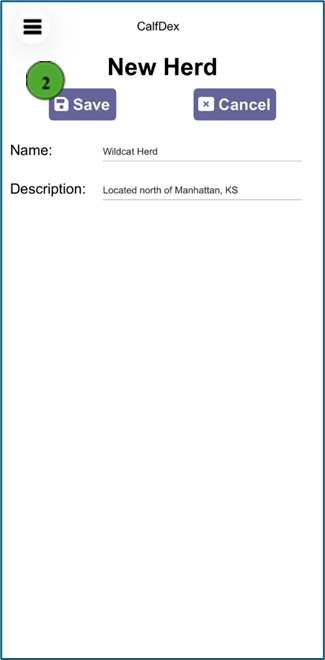
- A pop-out screen will appear on the right-hand side where you can enter the herd name and an optional description. Click "Save" to finish. There are no limitations to the number of herds that can be created. Cattle can also be relocated to a different, existing herd, utilizing the "Move" button.
How do I add an animal to my herd?
Add individual cattle records

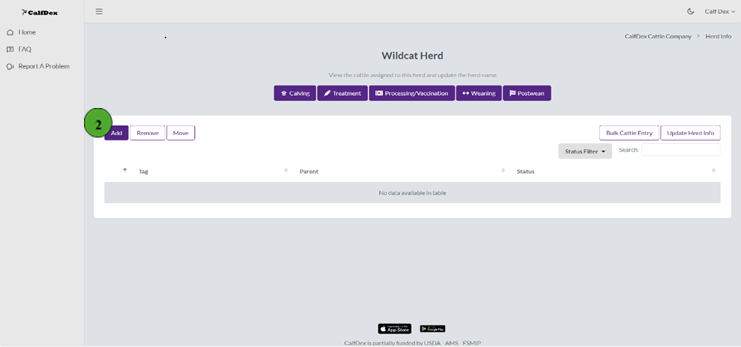
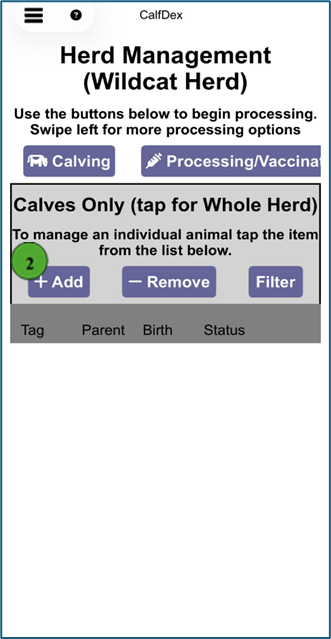
- To add an animal, first create the herd they will be designated to. Once created, select the herd name the animal will be added to
- Click the "Add" button in the top left corner
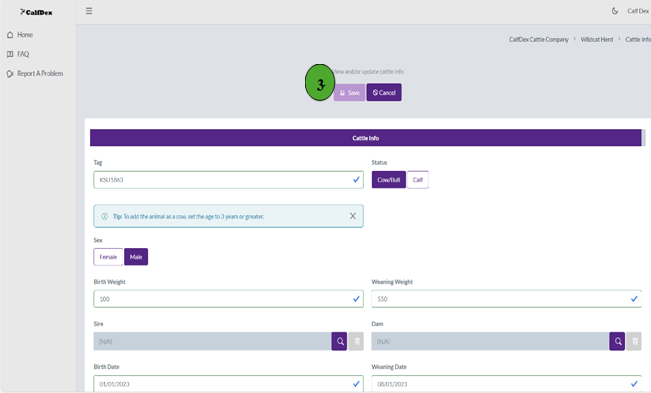
- When adding cattle tag, status, and sex are required. Birth weight, weaning weight, sire, dam, birth date, weaning date, branding date and notes are optional fields. Click "Save" to complete the entry.

How do I add numerous cows and heifers into my herd?
Bulk import multiple cattle at once Web Only
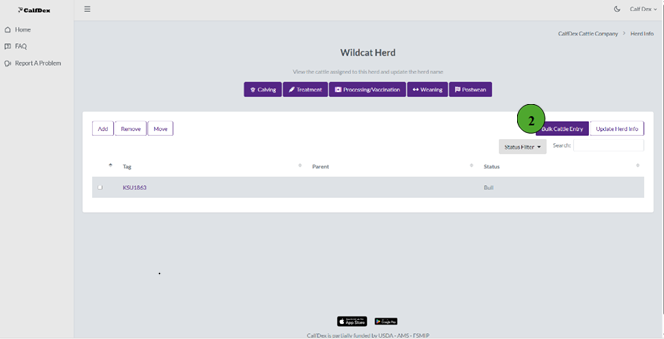
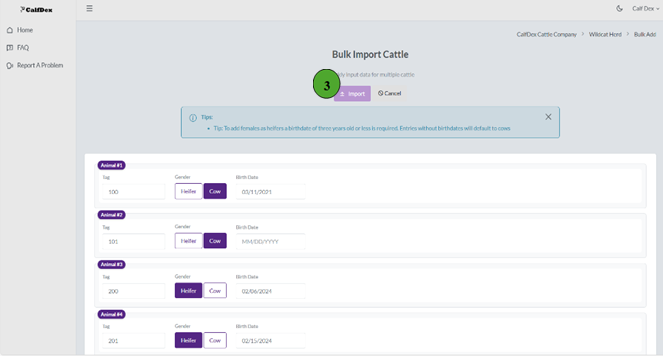
- For entering numerous dams, you must first create the herd they will be designated to. Then, select the appropriate herd on the ranch home screen
- Select "Bulk Cattle Entry" on the right-hand side
- You are then able to input tag numbers, identify dam as a heifer or cow, and birthdate. Once your information is input, click the purple "Import" button at the top of the screen.
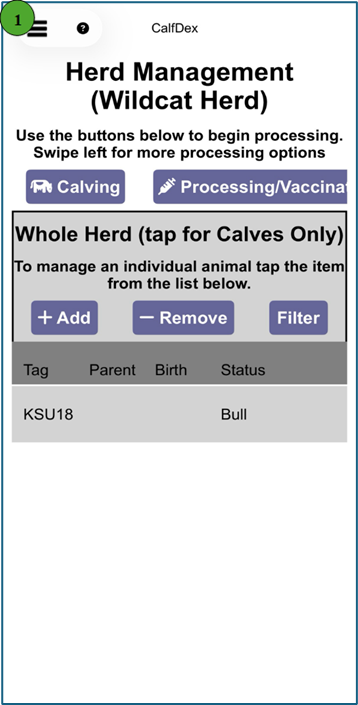
How do I use the "Calving" function?
Record newborn calves and pair with dams

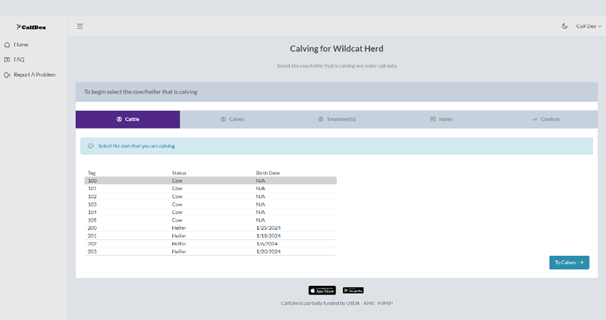

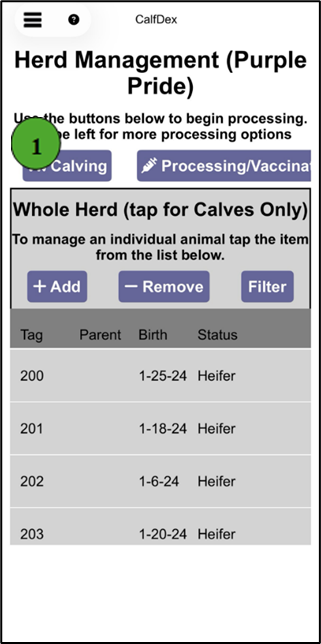
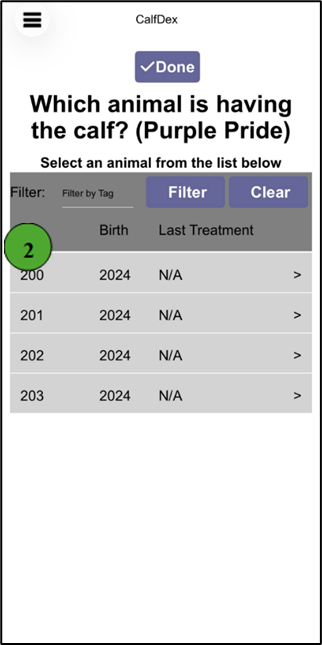
- To enter newborn calves to a herd, the herd must first be created (How to create a herd) and their appropriate dam must already be added to the herd (Adding animals). Once completed, from the ranch home screen click on the appropriate herd and then select the purple "Calving" button near the top of the screen.
- After entering the calving screen, select the calf's dam and then click "To Calves" in the bottom right corner to advance.
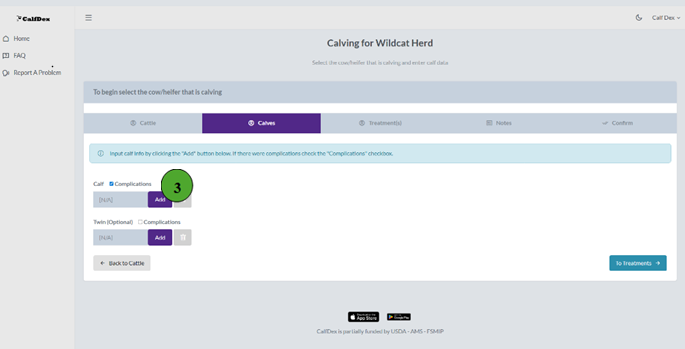
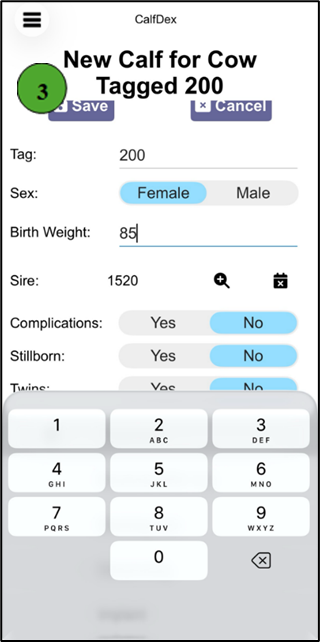
- The "Complications" box can be selected to note instances of dystocia. To input calf records, select the purple "Add" button.
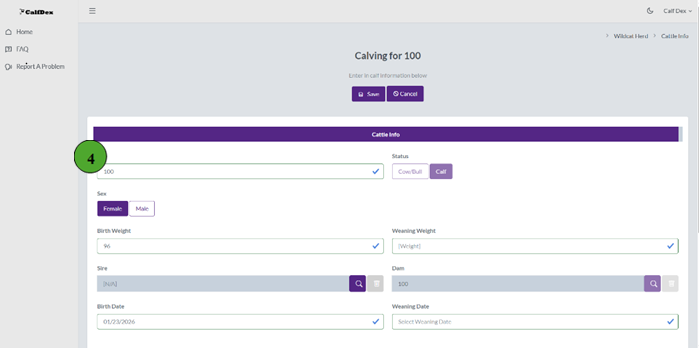
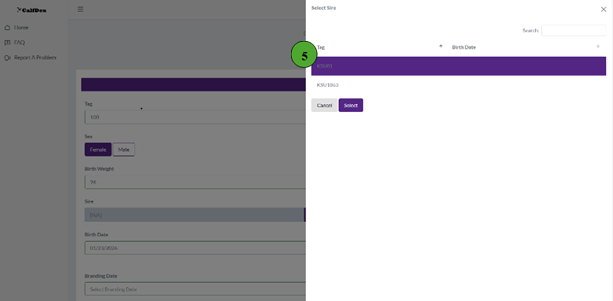
- The Tag and Sex fields are required to save the entry. To enter Birth Weight, simply select the box and type the corresponding weight. The Dam and Birth Date fields will be prepopulated based off of the prior selection and current date, respectively. To back log a birth date, simply click on the date and select the correct date from the calendar. Refer to Step 5 for Sire entries. Once satisfied with the input information, click "Save" at the top of the screen. You will then be returned to the "Calves" screen where you can repeat the process in the instance of twins. Click "To Treatments" in the bottom right corner of the screen to advance.
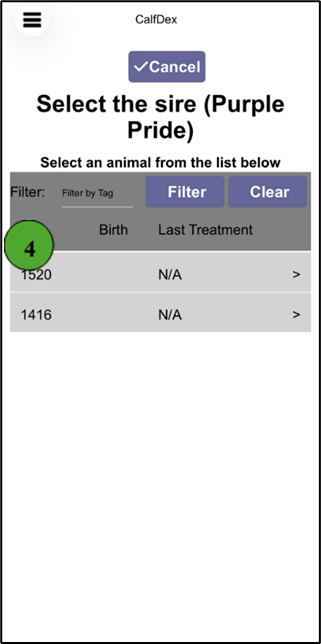
- For Sire entries, select the purple magnifying glass that corresponds with the Sire box. A side menu will appear on the right side where you can select the appropriate sire. Click "Select" to save your selection.
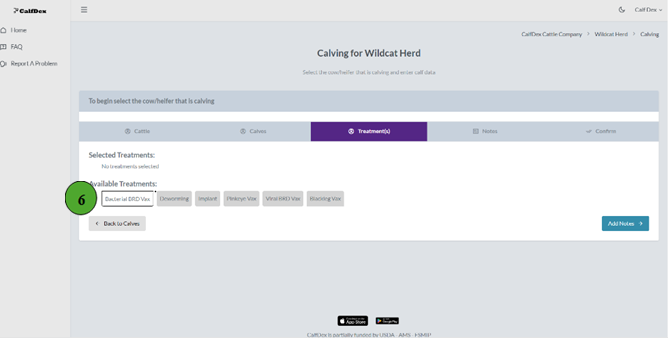
- If treatment(s) were administered at birth, select from the prepopulated list. Once complete, click "Add Notes" in the bottom right corner to advance.
- The "Notes" field is an optional entry that allows you to enter individualized notation to the calf's record. Simply select the box and type to input information. Once completed, select the "Review" button in the bottom right.
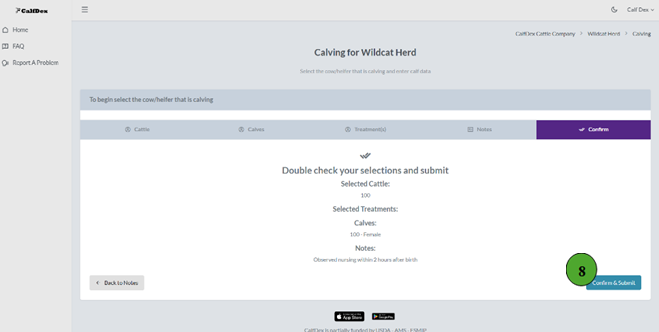
- Finally, review the information input for the calf's record. To edit any phase, simply select the corresponding entry point "Cattle", "Calves", "Treatment(s)", or "Notes." To complete the entry click "Confirm & Submit."
How do I add treatment records?
Record individual animal treatments
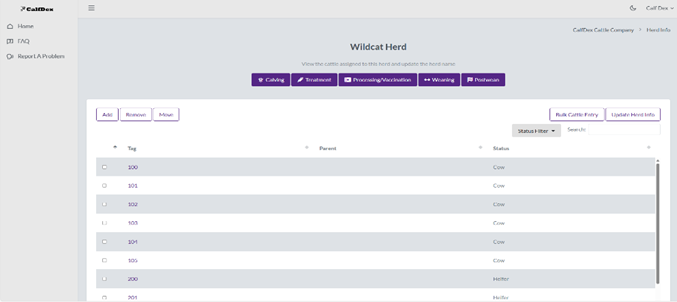
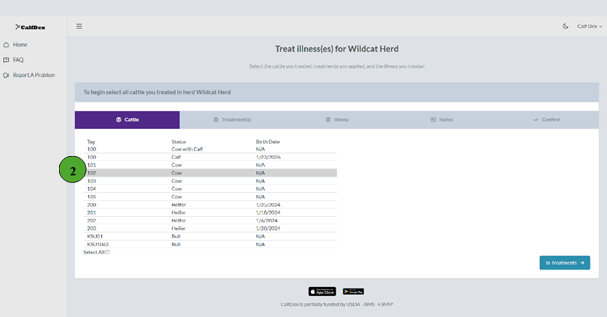

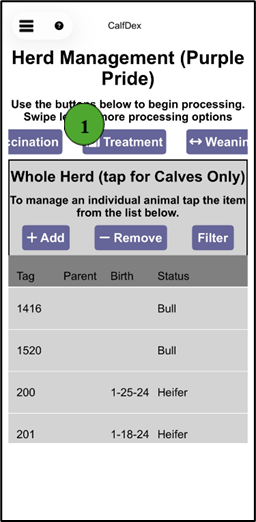
- To add treatment records to individual animals, first enter the herd the animal is associated with from the ranch home screen and then select the purple "Treatment" button at the top of the screen.
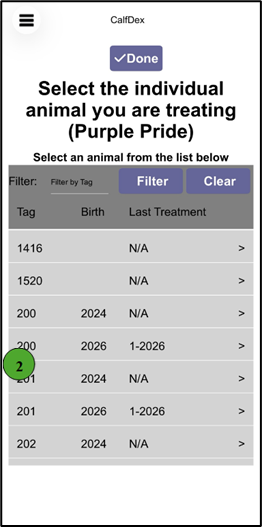
- After entering the treatment screen, select the ID of animal being treated and then click "To Treatments" in the bottom right corner to advance.
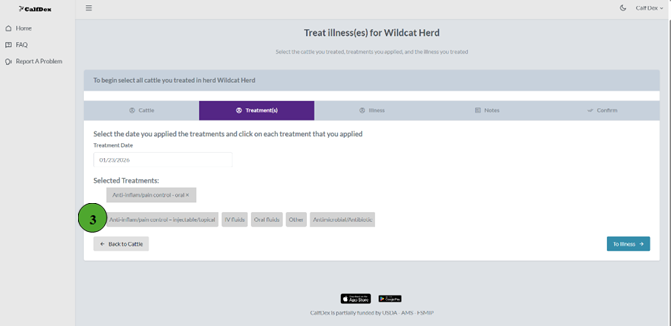
- From the prepopulated list, select the class of treatment(s) administered. Treatment Date is automatically populated as the day the record is input. To back log treatments, simply click in the treatment box and select the appropriate date from the pop-up calendar. Click "To Illness" in the bottom right corner to advance.
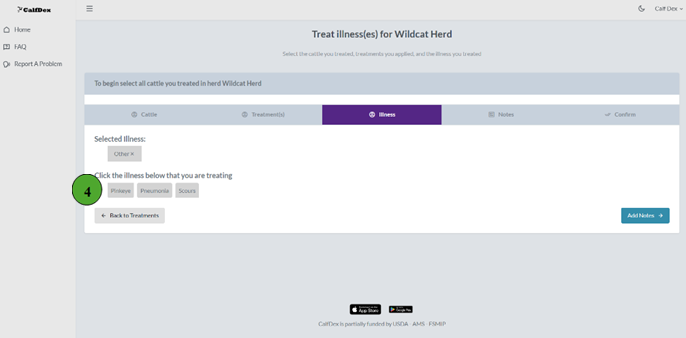
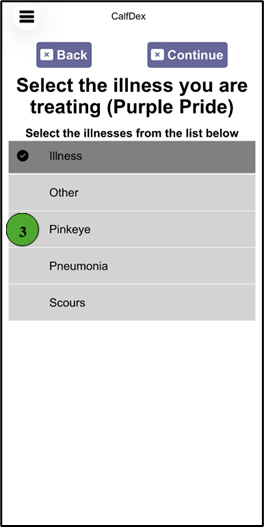
- Similarly to the treatment(s), select the illness(es) associated with the treatment. Click "Add Notes" once completed.
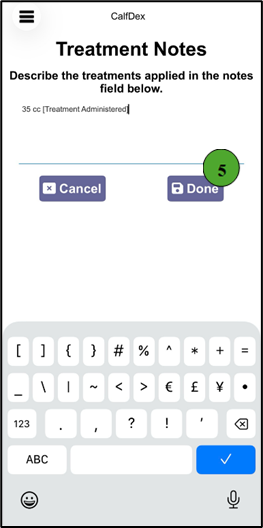
- Optionally, select the Notes box and type observations or treatment description associated with the treatment. Once completed, select "Review" to advance.
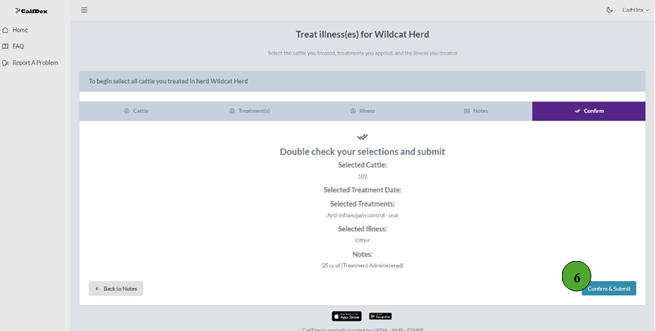
- Finally, review the entry. To make edits simply click the phase associated with the information: "Cattle," "Treatment(s)," "Illness," or "Notes." Once satisfied, click "Confirm & Submit" in the bottom right corner.

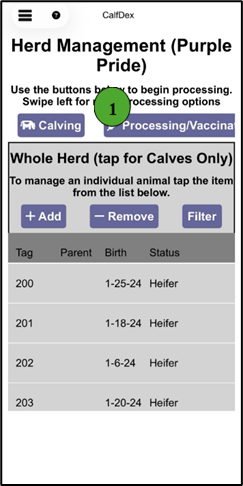
How do I apply "Processing/Vaccination" to my calves?
Record vaccinations for your calf crop
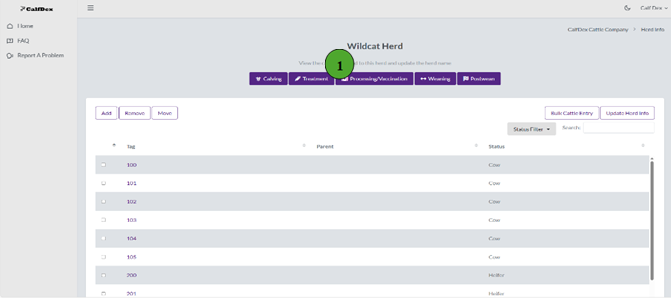
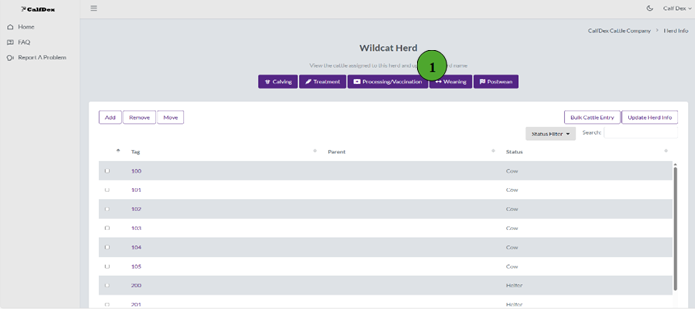
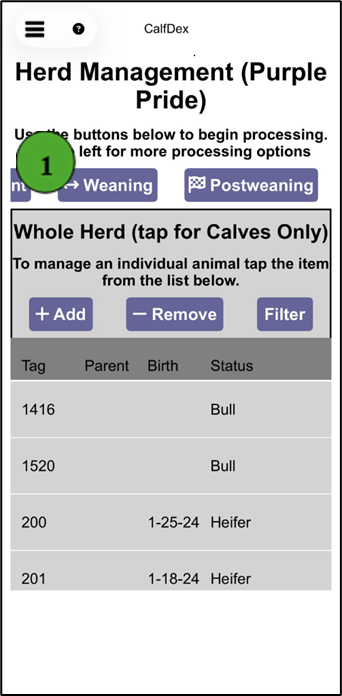
- To add processing/vaccination records to the current calf crop, first enter the herd you would like to process from the ranch home screen. Then, select the purple "Processing/Vaccination" button at the top of the screen.
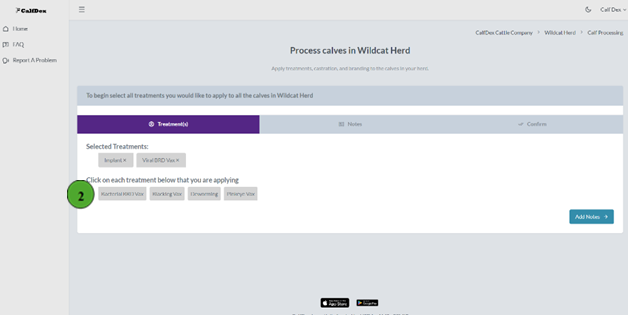
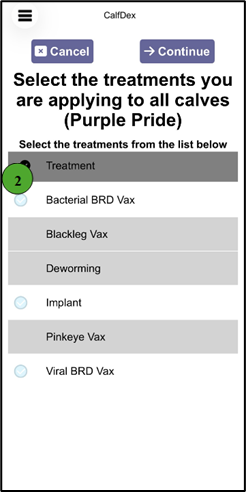
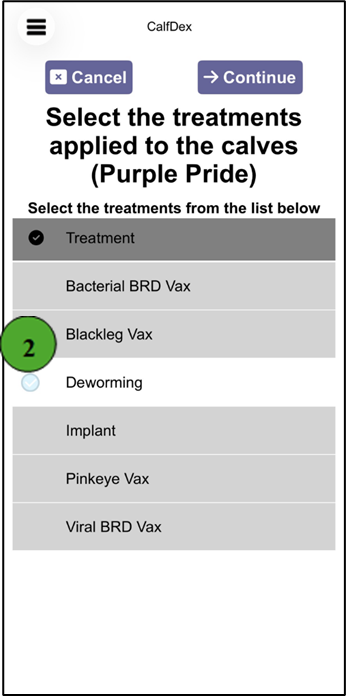
- Select the administered treatment(s) from the prepopulated list. Once completed, select the "Add Notes" button in the bottom right corner.
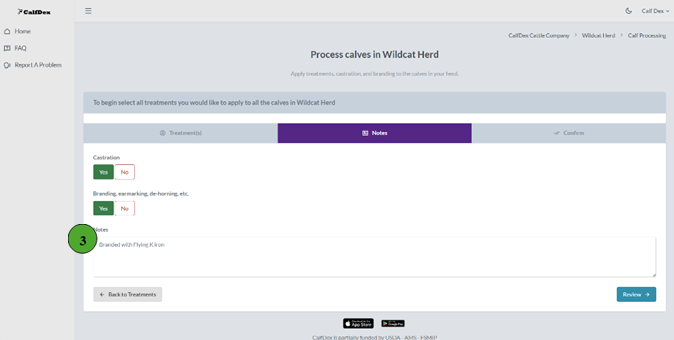
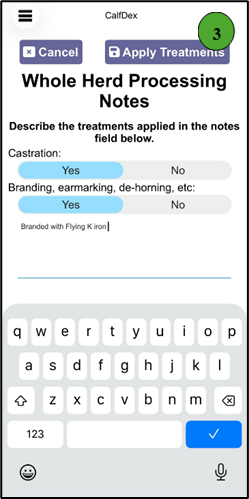
- Toggle "Yes" or "No" to indicate if castration and/or branding, earmarking, de-horning, etc. occurred. Optionally, click the "Notes" box to add additional information. To advance, select the "Review" button in the bottom right corner.
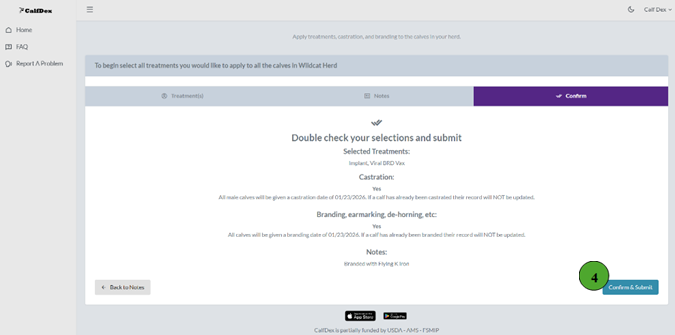
- Review the entries that will be applied to all calves in the herd, unless otherwise stated. To make edits, simply select the associated phase: "Treatment(s)" or "Notes". Once satisfied, select "Confirm & Submit" to save entries.
How do I wean my calves?
Record weaning weights and treatments
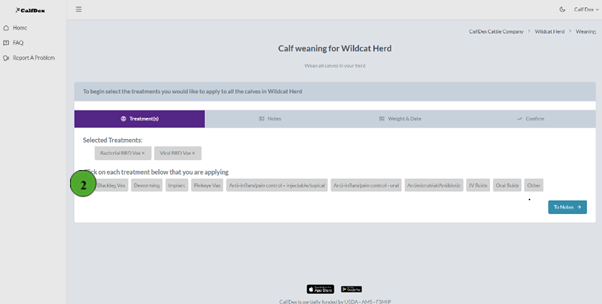
- To add weaning records to the current calf crop, first enter the herd you would like to wean from the ranch home screen. Then, select the purple "Weaning" button at the top of the screen.
- Select the administered treatment(s) from the prepopulated list. Once completed, select the "To Notes" button in the bottom right corner.
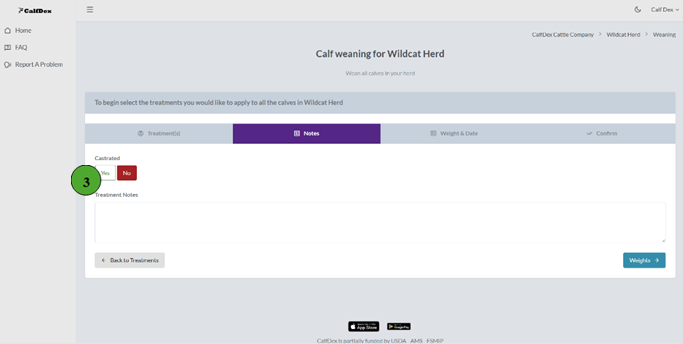
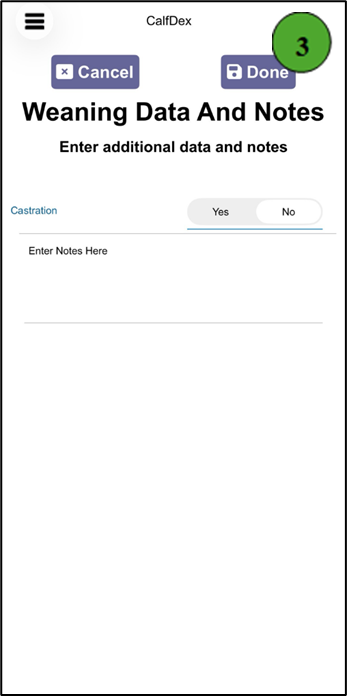
- Toggle "Yes" or "No" to indicate if castration occurred. Optionally, click the "Treatment Notes" box to add additional information. To advance, select the "Weights" button in the bottom right corner.
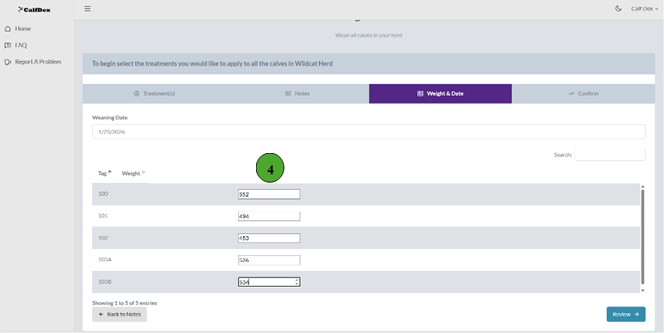
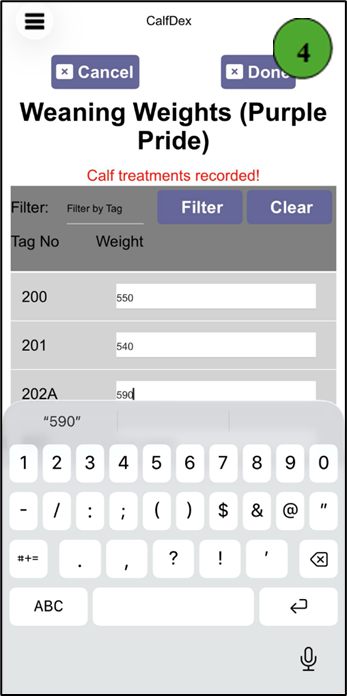
- The Weaning Date will automatically populate as the current date. To back log weaning, simply click in the box and select the correct date from the pop-up calendar that appears. Optionally, input weaning weights by selecting the box with the corresponding calf and typing the appropriate weight. Once completed, click "Review" to advance.
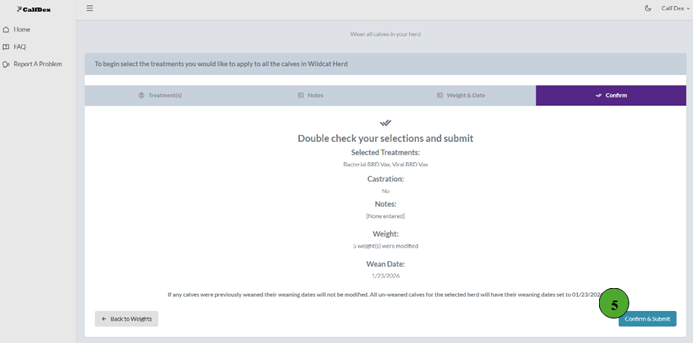
- Review the entries that will be applied to all weaned calves in the herd. To make edits, simply select the associated phase: "Treatment(s)", "Notes" or "Weights & Dates". Once satisfied, select "Confirm & Submit" to save entries.
What does it mean to Postwean my calves?
Assign calves to breeding, background, or sold
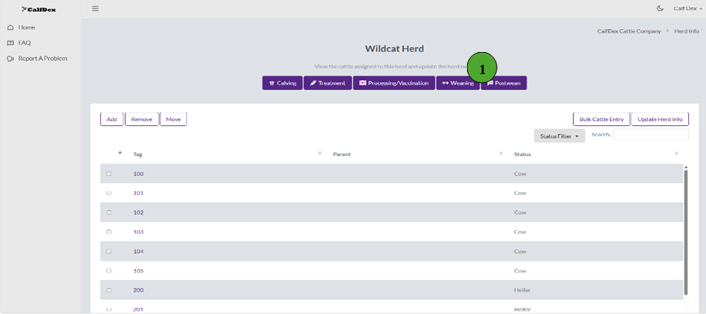

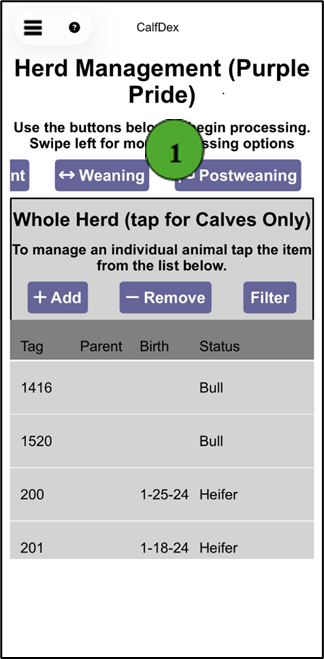
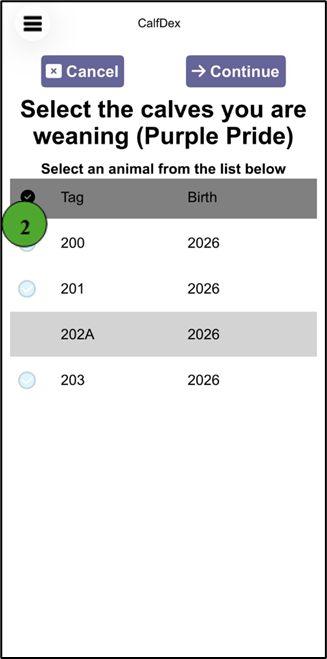
- The "Postwean" button has two functions: 1) It assigns weaned calves to their new placement; retain to background, retain for breeding, or sold 2) It unpairs calves from their dams, allowing dams to then reenter the calving phase for the next calf crop. To add postweaning records to the current calf crop, first enter the herd you would like to wean from the ranch home screen. Then, select the purple "Postwean" button at the top of the screen.
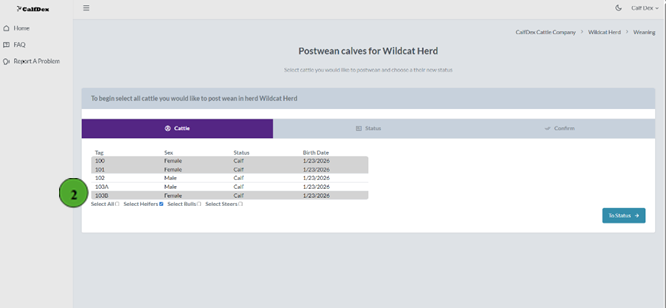
- Then, utilize the "Select All" boxes or individually select the calves you would like to postwean. Once all are selected, click the "To Status" in the bottom right corner.
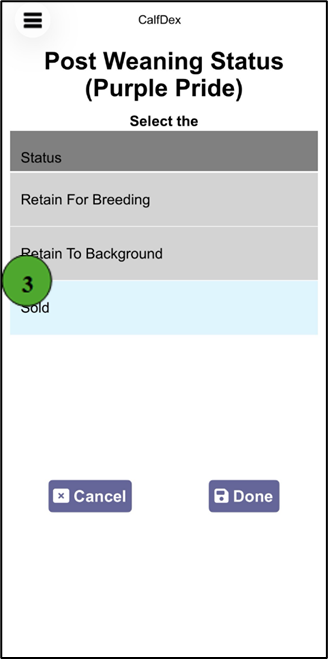
- Using the status dropdown menu, select if the calves will be retained to background, retained to breeding, or sold. Then, select "Confirm" in the bottom right corner.
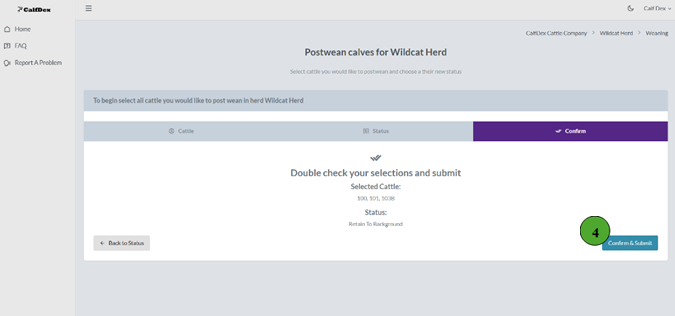
- Review the list of selected cattle and the assigned status. To make edits, select the corresponding phase: "Cattle" or "Status." Once complete, click "Confirm & Submit" in the bottom right corner.
How do I move cattle to a different herd?
Transfer animals between herds Web Only
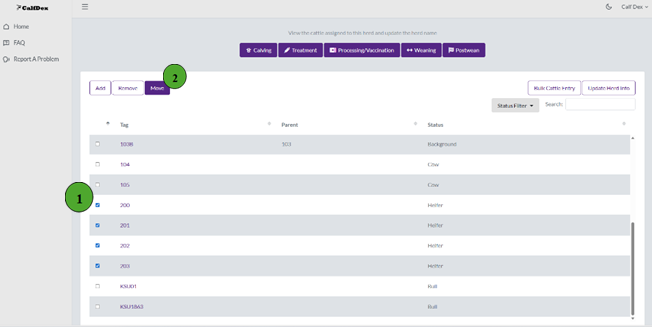
- To move cattle from one herd to another, it is essential to first create the herd they will be moved to (Add Herd). Then, from the ranch home screen access the herd of the cattle you want to move. First, select the records of each animal you want to move.
- Next, click the "Move" button in the top left corner.
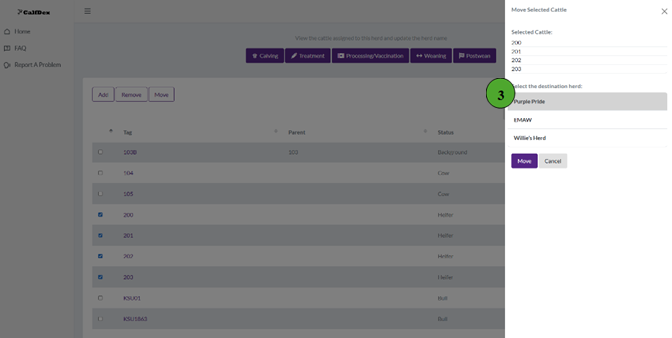
- On the right hand side, a selection pane will appear listing the cattle you selected and the existing herds in your ranch. Select the herd you would like to relocate the cattle to and select "Move" to complete the action.
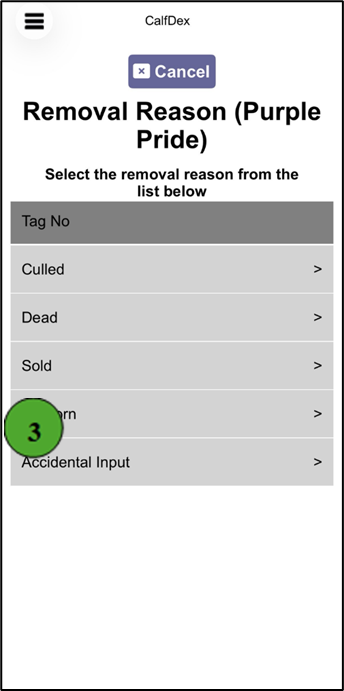
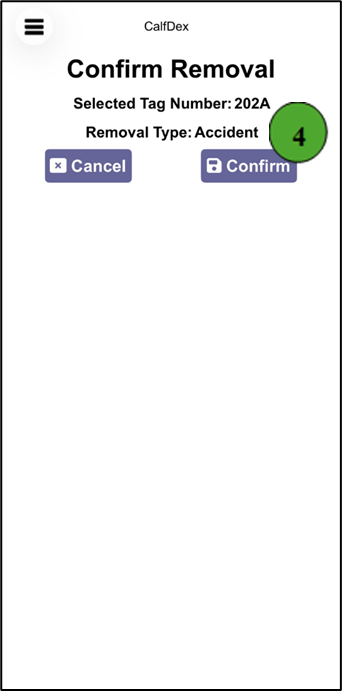
How do I remove cattle from my herd?
Record culled, dead, or sold animals
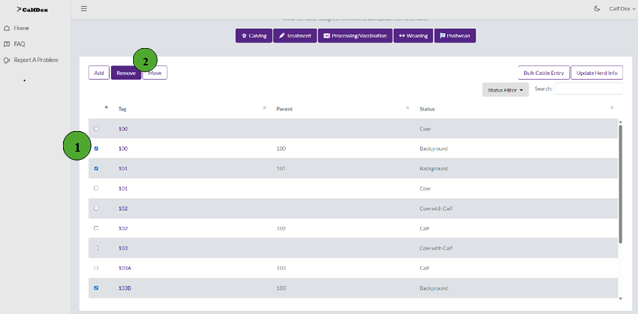
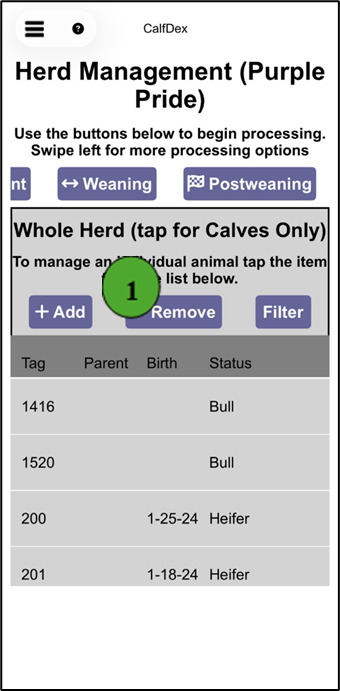
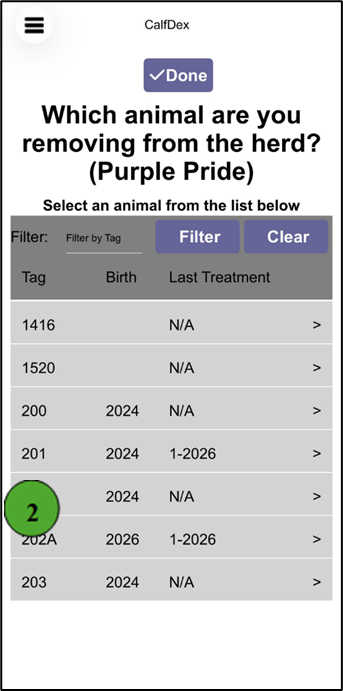
- To remove cattle from your active herd, first access the appropriate herd from the ranch home screen. Next, select the records of each animal you want to remove.
- Then, click the "Remove" button in the top left corner.
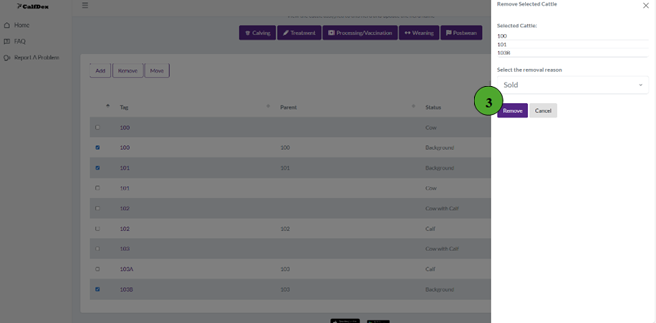
- On the right hand side, a selection pane will appear listing the cattle you selected and a drop down menu with reasons for removal: Culled, Dead, Sold, Stillborn, or Accidental Input. Select the appropriate reason and click "Remove" to complete the action.
How do I sync information between devices?
Keep data updated across web and mobile
For multiple users to access records off different devices, they must login to one account using the same email and password.
CalfDex automatically syncs information between the web and mobile devices every three minutes if in range of a strong cellular or WiFi connection.
If data is input on a mobile device outside of cellular range, new information is safely stored on the device and will sync across platforms once within network range.
How do I export my data?
Download your records as a spreadsheet
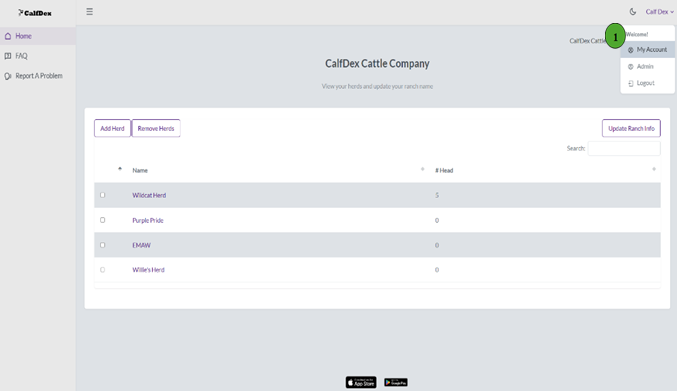
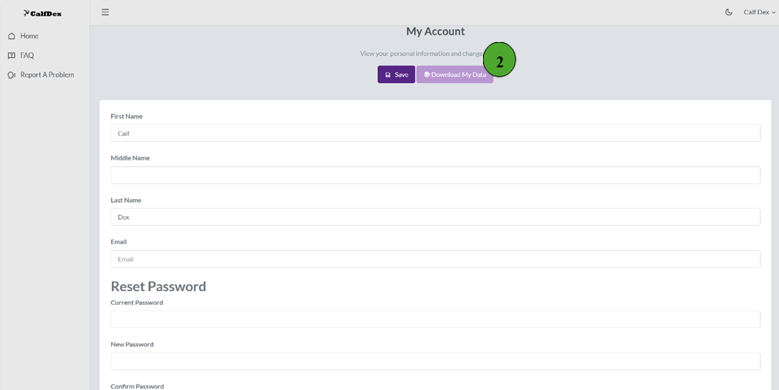
- To access your data on a computer spreadsheet, first login to your account and then click your first and last name in the top right corner. A drop down menu will then appear, select "My Account"
- On the My Account page, click the purple "Download My Data" button near the top of the page.
Are IDs for breeding stock retained from year-to-year?
Understanding how records persist over time
Yes, IDs of breeding stock will remain in the same herd year after year unless moved to a different herd or removed entirely.
This eliminates the need to enter IDs each year and maintains records over time. A dam is eligible to reenter the calving phase only after her offspring has been postweaned.
Can pictures be added to individual records?
Image attachment capabilities
Unfortunately, CalfDex does not currently support adding pictures to individual animal records.